Is your XJ (or even Toyota) having trouble starting? Or maybe your backup lamps just don’t work. You can either spend hundred of dollars getting a replacement neutral start switch (aka Park/Neutral Position switch) or you can spend a few dollars in supplies and about twenty minutes and fix it yourself.
You will need the following items:
12mm wrench or socket
7/8″ wrench or socket
#2 phillips screwdriver
Standard screwdriver
Contact cleaner
Dielectric grease
Forceps or small needlenose pliers
Dental pick or other small sharp object
Steel wool and/or brass wire brush
Multimeter
You start by removing your Neutral Start Switch (NSS). The NSS is located on the passenger side of the transmission just behind the bellhousing area. To remove it you simple use your standard screwdriver to bend the tabs (not visible in the below photo) that secure the large nut flat and remove this nut. Then remove the 12mm bolt on the top of the NSS and simply pull it straight outward, you may need to use screwdrivers to pry it outward if it is giving you trouble.
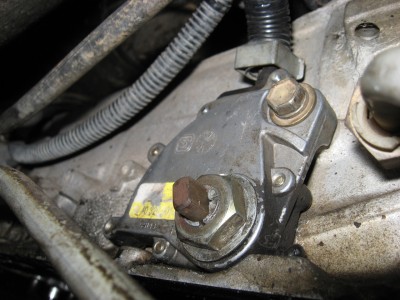
NSS Installed, click to see it larger
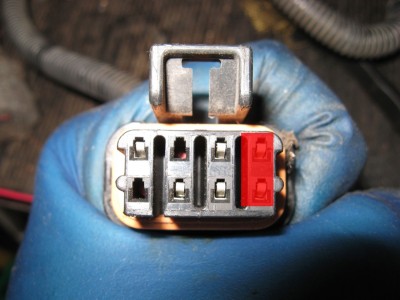
After you’ve freed up the bottom end you will need to disconnect the wiring harness. The wiring harness connector is located near the passenger side rear of the cylinder head, it is the only black connector that looks like the photograph below (there is a grey one that is a lot like it, ignore that one). To separate the two halves of the connectors pull up on the tab (do not down like usual) and pull, then feed the wiring harness down and remove the switch from the bottom of the vehicle. You may have to cut some zip ties or other clips free in order to remove it.
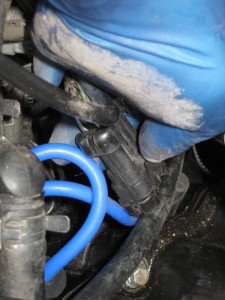
NSS Connctor, click to see it larger
Now that you have the switch out remove the screws from the back of the NSS and set them aside.
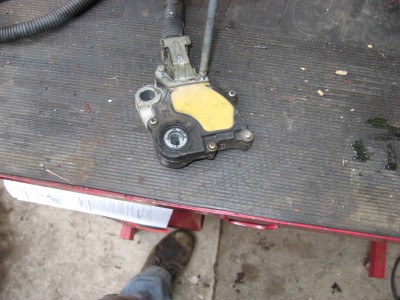
Back of NSS, click to see it larger
Next pry the two halves of the NSS apart being careful not to lose any parts that may fall out. What you should see is a bunch of old dirty dielectric grease and some cruddy looking copper contacts.
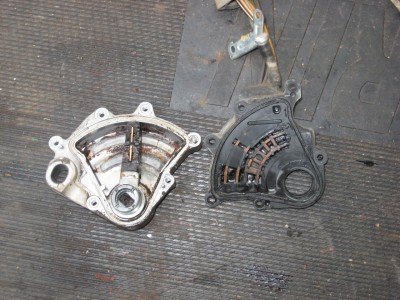
Switch apart, click to see it larger
First remove the two contacts from the switch arm and the springs behind them. I use a pair of forceps to gently grasp the contacts and pull them free, then I use a dental pick type tool to hook the small springs and pull those dirty things out.
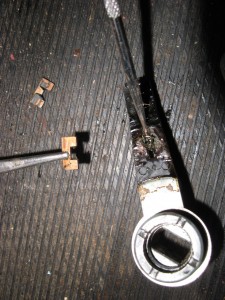 Switch arm contacts, click to see it larger
After getting all the pieces out spray everything down with contact cleaner (brake cleaner will also work) and make sure to get all the old caked on dielectric grease out. After doing that take your steel wool or brass brush and polish the top of those copper contacts up.
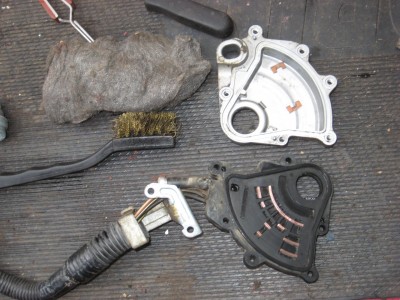 Inside of switch cleaned up, click to see it larger
Now take your dielectric grease and lightly coat the switch arm and switch housing, be careful not to use so much that it gums everything up then start putting it back together. Start by inserting the small springs into their holes in the switch arm then lay the contacts over them. Now gently lay the back of the switch over the switch arm being careful to make sure that the switch arm contacts do not come out of position.
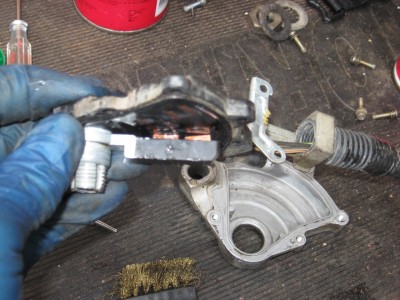
Switch arm contacts, click to see it larger
Then flip the switch over and put the aluminum switch over in place and secure the four bottom screws (leaving the screws that secure the wire harness out). Now put the wiring harness bracket into position, take care to make sure the switch vent is properly tucked into the convoluted tubing.
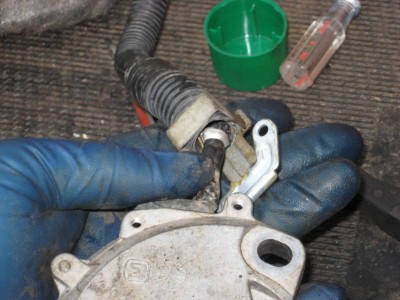
NSS harness, click to see it larger
Now put the remaining two screws in and you’re done, you’ve now fixed your neutral start switch and are ready to install it.
Start by placing the switch into position and putting the 7/8″ nut on, you don’t want to over tighten this nut as the switch arm does still have to move. Next put the 12mm bolt in and run it down to finger tight, then back it off one half turn. You will now need to adjust the NSS. Take your multimeter and make sure there is continuity across these terminals for each shifter position.
With the shifter in Park you should have continuity between terminals B and C.
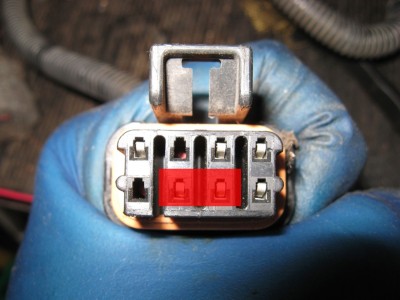
Shifter in Park, click to see it larger
With the shifter in Reverse you should have continuity between terminals A and E.
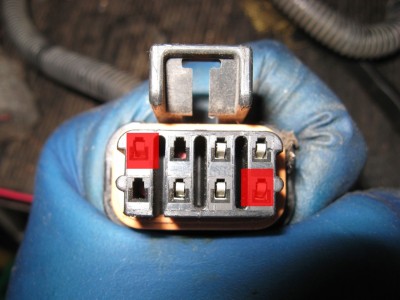
Shifter in reverse, click to see it larger
With the shiver in Neutral you should have continuity between terminals B and C (the same as in Park).

Shifter in Neutral, click to see it larger
With the shifter in Drive you should not have continuity between any terminals.
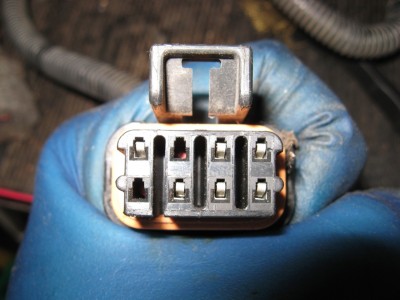
Shifter in Drive, click to see it larger
With the shifter in Third you should have continuity between terminals A and G.
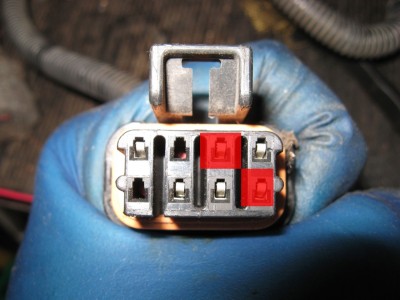
Shifter in Third, click to see it larger
And finally with the shifter in First/Second you should have continuity between terminals A and H.
Shifter in First/Second, click to see it larger
Now tighten up the 12mm set bolt and double-check the switch alignment when you run the shifter back up into Park. Now re-route the cable back up the firewall and plug the connector in.
All done!


wim hoppenbrouwers
October 23, 2009 at 5:56 am
Nice.
Good pics of the connector.
greetings from Holland.
wim(naxja)
Brad
November 1, 2009 at 2:00 pm
Some notes, since I just took mine out. Many sites recomend leaving the big nut on and using that as a pry point against the trans pan to get the NSS off the trans. BE CAREFUL DOING THIS. The threads on the NSS are aluminum and I broke two of the four threaded sections off doing this. Now I have to buy an entire new NSS, unless I can somehow find just the wiper arm/threads part. 🙁 Also on my 99, the connector on the harness end is GRAY and looks absolutely nothing like the one in your picture. Thanks for the article!
GSequoia
November 5, 2009 at 2:30 pm
Yes, I’ve heard that the 97+ NSS has a different connector on the end. If somebody wants to send me a 97+ NSS I’ll R&R it free so I can take some pictures.
Sequoia
Brad
November 5, 2009 at 3:39 pm
I am about to check my new one out and adjust it right now and I will post my results.
Tyson
November 11, 2009 at 10:50 am
Why would you but a new nss? the adjuster bolt is enough to keep it on the transmission. i dont know why you would need the main pinch bolt. can anyone think of a reason why?
edward
December 29, 2009 at 9:41 am
Tyson,
My question exactly, why would a new NSS be needed simply because the male threads for the big (castle nut) were broken…wouldn’t the adjuster bolt hold the assembly in place?
even as I write this I’m thinking perhaps the castle nut is simply to keep tension on the wiper arm bushing to keep positive pressure betw the arm and contacts??
I wish I had read this site before trying to pull the NSS, since I broke the threads on the wiper arm assy following another sites advice to use the castle nut as the pry point…lesson learned and new NSS going for $348 at advanced auto parts. maybe I’ll go without a castle nut and see what happens
tyler k
November 8, 2010 at 3:33 am
all i have to say is this article and all who contributed are some kind of saints 🙂 ill be attempting this on the weekend and would have never known what to do. i probably woulda spit shined the casing and thought thats all ya do
matt
November 24, 2010 at 2:39 pm
i think i figured it out. cracked mine in the process but hopefully the glue will hold. i had to put the trans in to 1-2 on the gear lever and then pull it out, any other gear it didnt work but came out easy. i cracked it with it in park. i hope this helps someone
tyler k
December 11, 2010 at 8:18 pm
matt may be right, i found one at the junk yard and with the nut and bolt off i couldnt pry it off, i gave up. thanks matt
Charlie P
January 23, 2011 at 2:12 pm
have you R&R’d a 97+ yet? I am looking for the specs on the connection.
jesse
February 13, 2011 at 10:44 am
thank you i found this very helpful.
JON
February 17, 2011 at 11:56 am
I did exactly as you put in this posting it seemed to do it again, but once I shifted really good and let the die-electric grease take in effect it worked like a charm started up everytime……Awesome post and worked like a charm….Thanks alot
Mark
October 17, 2011 at 12:32 am
Thanks for this great article! I followed the instruction and have saved a lot of money, my Jeep is running like a charm. Mine is the 99 XJ and the connector is GREY… also I’m from down-under and we drive on the wrong side 🙂 so the switch is located on the drivers side if you are from Australia or NZ. All the best and thanks again!
Mart
November 28, 2011 at 7:18 pm
This is a great article. Thanks for posting pics of the connector switch unplugged so the pins to test continuity can be seen. That helps a lot. It also gives me an idea to go back down the wire harness a few inches and splicing in a toggle or button switch between wires B and C and mounting it on my dashboard to over ride when the NSS switch on the tranny clogs up. All the additional comments from everyone helps also. Keep sharing guys. BTW, if you break yours go to a junk yard and look for one and open it and clean it and it should work just fine. Also I priced one at AutoZone for about $250.00
Chris
February 24, 2013 at 6:38 am
Great article. Followed them to a T and fixed my problem of the reverse lights working sporadically. Taking apart and cleaning was very easy. One thing I did was when putting the NSS back on I just put the adusting bolt back exactly where it had been by looking at the rust marks on the NSS thus knowing exactly where it had been. Once on I tested and it worked great.
Tom
February 26, 2014 at 1:29 pm
i fallowed all the instructions and didnt get the proper response when testing with my multimeter. so i bough a new one and have the exact same proplem. i still have no conduction while in nuetral or 1 or 2 any ideas?